
使用 XNA 建立遊戲/數學物理/角色動畫
在這裡,我們必須區分骨骼動畫和關鍵幀動畫。重點是展示如何使用 XNA 實現這兩種型別的動畫。應特別注意 XNA 框架提供的約束(例如,著色器 2.0 模型不允許超過 59 個關節)。
動畫僅僅是一種錯覺——它是由一系列影像建立的。每個影像都與前一個略有不同。我們只是將這樣一組影像感受為變化的場景。
呈現動畫最常見的方法是作為一部電影或影片程式,儘管還有其他方法。 [1]
在計算機動畫中,它有兩種形式:一種更“經典”的,源自翻書本的已知關鍵幀動畫;另一種是骨骼動畫,預設情況下,它來自 3D 動畫。

http://commons.wikimedia.org/wiki/File:Muybridge_race_horse_animated.gif
關鍵幀動畫是一種動畫技術,最初用於經典卡通中。關鍵幀定義了動畫的起點和終點。它們填充了所謂的中間幀或過渡幀。
在傳統的關鍵幀動畫中,例如用於手繪動畫片,高階藝術家(或關鍵藝術家)將繪製關鍵幀。(僅動畫的重要圖片)在粗略動畫測試之後,他將其交給助手,助手進行必要的“中間幀和清理”。
在計算機圖形學中,它與卡通的概念相同:關鍵幀由使用者建立,中間幀由計算機補充。“關鍵幀”儲存物件的位置、旋轉和縮放等引數。計算機對後續的中間幀進行插值。
一個物件將從一個角移動到另一個角。第一個關鍵幀顯示物件位於左上角,第二個關鍵幀顯示物件位於右下角。兩者之間的所有內容都進行了插值。
- 使用示例
-
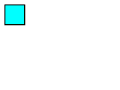
起始關鍵幀 -
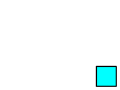
結束關鍵幀 -

完成的動畫


前面的部分提到了一些關鍵幀動畫支援多種插值方法。動畫的插值描述了動畫在其持續時間內如何在值之間過渡。透過選擇與動畫一起使用的關鍵幀型別,可以定義該關鍵幀段的插值方法。有三種不同的插值方法:線性、離散和樣條。
[2]
各個片段以恆定的速度透過。
使用離散插值,動畫函式在值之間跳轉,而不進行插值。
http://msdn.microsoft.com/uk-en/library/ms742524.aspx

待編輯各個引數儲存在一個列表中。如果現在有了時間線的長度和元素的數量,就可以從中推斷出在何時可以訪問哪個關鍵幀。(透過增加時間線計數器,然後呼叫相應關鍵幀,就像例如在連環畫中,其中 1 頁是 1 個關鍵幀,翻到相應的頁一樣)。
下面顯示了一個類,可以用它來實現這一點。原始碼在下面可以找到。
一個小的關鍵幀動畫類
using System.Collections.Generic;
using Microsoft.Xna.Framework;

namespace PuzzleGame
{
    /// <summary>
    /// Keyframe animation helper class.
    /// </summary>
    public class Animation
    {
        /// <summary>
        /// List of keyframes in the animation.
        /// </summary>
        List<Keyframe> keyframes = new List<Keyframe>();

        /// <summary>
        /// Current position in the animation.
        /// </summary>
        int timeline;

        /// <summary>
        /// The last frame of the animation (set when keyframes are added).
        /// </summary>
        int lastFrame = 0;

        /// <summary>
        /// Marks the animation as ready to run/running.
        /// </summary>
        bool run = false;

        /// <summary>
        /// Current keyframe index.
        /// </summary>
        int currentIndex;

        /// <summary>
        /// Construct new animation helper.
        /// </summary>
        public Animation()
        {
        }

        /// <summary>
        /// Add a keyframe to the animation.
        /// </summary>
        /// <param name="time">Time for keyframe to happen.</param>
        /// <param name="value">Value at keyframe.</param>
        public void AddKeyframe(int time, float value)
        {
            Keyframe k = new Keyframe();
            k.time = time;
            k.value = value;
            keyframes.Add(k);
            keyframes.Sort(delegate(Keyframe a, Keyframe b) { return a.time.CompareTo(b.time); });
            lastFrame = (time > lastFrame) ? time : lastFrame;
        }

        /// <summary>
        /// Reset the animation and flag it as ready to run.
        /// </summary>
        public void Start()
        {
            timeline = 0;
            currentIndex = 0;
            run = true;
        }

        /// <summary>
        /// Update the animation timeline.
        /// </summary>
        /// <param name="gameTime">Current game time.</param>
        /// <param name="value">Reference to value to change.</param>
        public void Update(GameTime gameTime, ref float value)
        {
            if (run)
            {
                timeline += gameTime.ElapsedGameTime.Milliseconds;
                value = MathHelper.SmoothStep(keyframes[currentIndex].value, keyframes[currentIndex + 1].value
                (float)timeline / (float)keyframes[currentIndex + 1].time);
                if (timeline >= keyframes[currentIndex + 1].time && currentIndex != keyframes.Count) { currentIndex++; }
                if (timeline >= lastFrame) { run = false; }
            }
        }

        /// <summary>
        /// Represents a keyframe on the timeline.
        /// </summary>
        public struct Keyframe
        {
            public int time;
            public float value;
        }
    }
}
資源: http://tcsavage.org/2011/04/keyframe-animation-in-xna/
http://xnanimation.codeplex.com/
http://msdn.microsoft.com/uk-en/library/ms742524.aspx
http://en.wikipedia.org/wiki/Animation
http://msdn.microsoft.com/uk-en/library/ms752312.aspx
http://tcsavage.org/2011/04/keyframe-animation-in-xna/
http://de.wikipedia.org/wiki/Spline-Interpolation
http://en.wikipedia.org/wiki/Spline_interpolation
ARei
骨骼動畫是計算機動畫中的一種技術,它由兩部分組成:皮膚部分(稱為網格)和骨骼部分(稱為繫結)。皮膚表示為表面的組合,骨骼表示為骨骼的組合。這些骨骼像真正的骨骼一樣相互連線,並且是分層集的一部分。結果是,您移動一根骨骼,其他應該相互作用的骨骼也會隨之移動。骨骼以相同的方式動畫化網格(表面)。雖然此技術通常用於動畫化人類或更普遍地用於有機建模,但它僅用於使動畫過程更直觀,並且可以使用相同的技術來控制任何物件的變形,例如建築物、汽車等。

這種技術對動畫師非常有用,因為在所有動畫系統中,這種簡單的技術都是一個移植版本。因此,他們不需要任何複雜的演算法來動畫化模型。如果沒有這種技術,幾乎不可能將網格與骨骼結合起來進行動畫化。
http://en.wikipedia.org/wiki/Skeletal_animation

繫結是建立骨骼以動畫化模型的技術。這個骨骼由骨骼(繫結)和關節組成,關節是骨骼之間的連線。通常,您將這些骨骼和關節與真實骨骼的特性相關聯。例如,您首先建立上腿作為骨骼,然後建立膝蓋作為關節。
http://de.wikipedia.org/wiki/Rigging_%28Animation%29

蒙皮(Skinning)是一種將皮膚材質賦予骨骼框架(骨骼)的技術,皮膚的運動如同骨骼的運動。蒙皮技術在繫結(Rigging)之後進行。蒙皮和繫結的區別在於,蒙皮是模型(你的模型)的視覺變形。能夠設定每個單獨的表面是一個很有用的特性,這在諸如手臂運動之類的場景中非常有用。即使你移動你的手臂(或模型的手臂),你的皮膚(模型的表面)會以不同的方式與運動互動,這取決於位置,例如你的肘部內側或肘部外側。在此背景下,還可以模擬肌肉運動。http://de.wikipedia.org/wiki/Skinning
- 骨骼:4.0版本中最多可達59到79根。
- 多邊形:取決於硬體。
- Motion Builder http://www.autodesk.de/adsk/servlet/pc/index?id=15013088&siteID=403786
- 3ds Max http://www.autodesk.de/adsk/servlet/pc/index?id=14642267&siteID=403786
- Maya http://www.autodesk.de/adsk/servlet/pc/index?siteID=403786&id=14657512
在XNA中,獲取模型動畫的最簡單方法是在3D開發工具中建立動畫。這些動畫會自動成為匯出的.x檔案或.fbx檔案的一部分。
一個展示XNA中動畫處理的簡單方法是來自http://create.msdn.com/en-US/education/catalog/sample/skinned_model的一個不錯的演示。
首先我們需要一個模型和一個動畫。
Model currentModel;
        AnimationPlayer animationPlayer;
下一步是更新LoadContent()方法。
protected override void LoadContent()
        {
            // Load the model.
            currentModel = Content.Load<Model>("dude");

            // Look up our custom skinning information.
            SkinningData skinningData = currentModel.Tag as SkinningData;

            if (skinningData == null)
                throw new InvalidOperationException
                    ("This model does not contain a SkinningData tag.");

            // Create an animation player, and start decoding an animation clip.
            animationPlayer = new AnimationPlayer(skinningData);

            AnimationClip clip = skinningData.AnimationClips["Take 001"];

            animationPlayer.StartClip(clip);
        }
如果將clib變數設定為陣列,可以儲存許多不同的動畫。
AnimationClip clips= new AnimationClip[skinningData.AnimationClips.Keys.Count];
clips[0] = skinningData.AnimationClips["moveleft"];
clips[1] = skinningData.AnimationClips["moveright"];
clips[2] = skinningData.AnimationClips["jump"];
之後就可以輕鬆地呼叫不同的動畫,例如透過按下跳躍鍵。
animationPlayer.StartClip(clip[2]);
其他動畫也適用相同的方法。
-
 不同的運動
不同的運動 -

-

-
-


http://de.wikipedia.org/wiki/Skinning
http://create.msdn.com/en-US/education/catalog/sample/skinned_model
http://de.wikipedia.org/wiki/Rigging_%28Animation%29
http://www.mit.edu/~ibaran/autorig/
http://www.mixamo.com/c/auto-rigger
http://www.der-softwareentwickler-blog.de/2011/05/30/video-tutorials-rigging-und-animation/
http://www.digitalproducer.com/2004/01_jan/tutorials/01_26/maya_rigging.htm
FixSpix
在本章中,我們學習了兩種不同的角色動畫方法。首先是關鍵幀動畫,然後是骨骼動畫。這兩種技術在XNA中非常重要。
在這個語境下,“更好”這個詞用得不太合適,讓我們用“在什麼情況下更好”來替換“更好”。很簡單……在3D場景中使用骨骼動畫,在2D場景中使用關鍵幀動畫。
fixspix
A.Rei 和 FixSpix